Setting up your Lightrun account
Lightrun’s developer observability platform offers a fully-manged SaaS solution, which we will use during this workshop.
Note that if your topology requires single-tenant, private cloud or on-prem deployments (whether airgapped or not), this workshop still applies to you! Contact us for more information on how to setup Lightrun in your own environment.
Getting Started with Lightrun
-
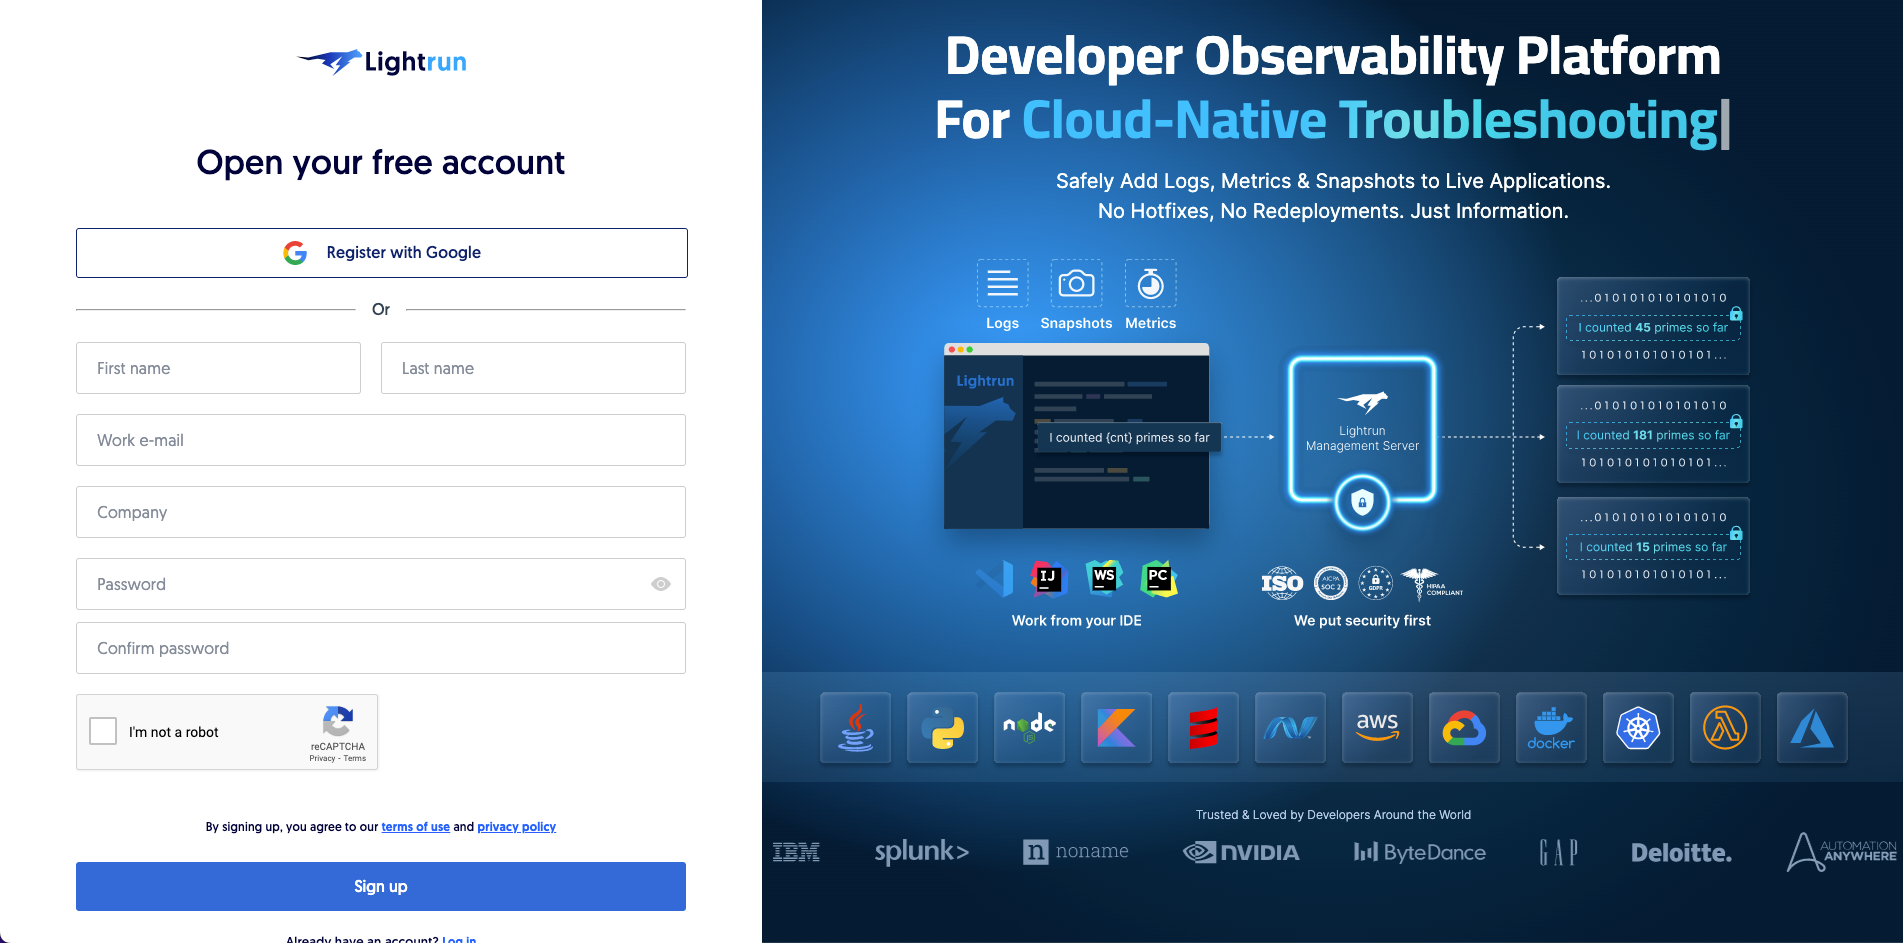
From your browser, navigate to Lightrun Cloud and fill the registration form:
Please make sure to input “AWS Workshop” as your company name, to ensure your account is configured correctly for this workshop in our backend servers.

-
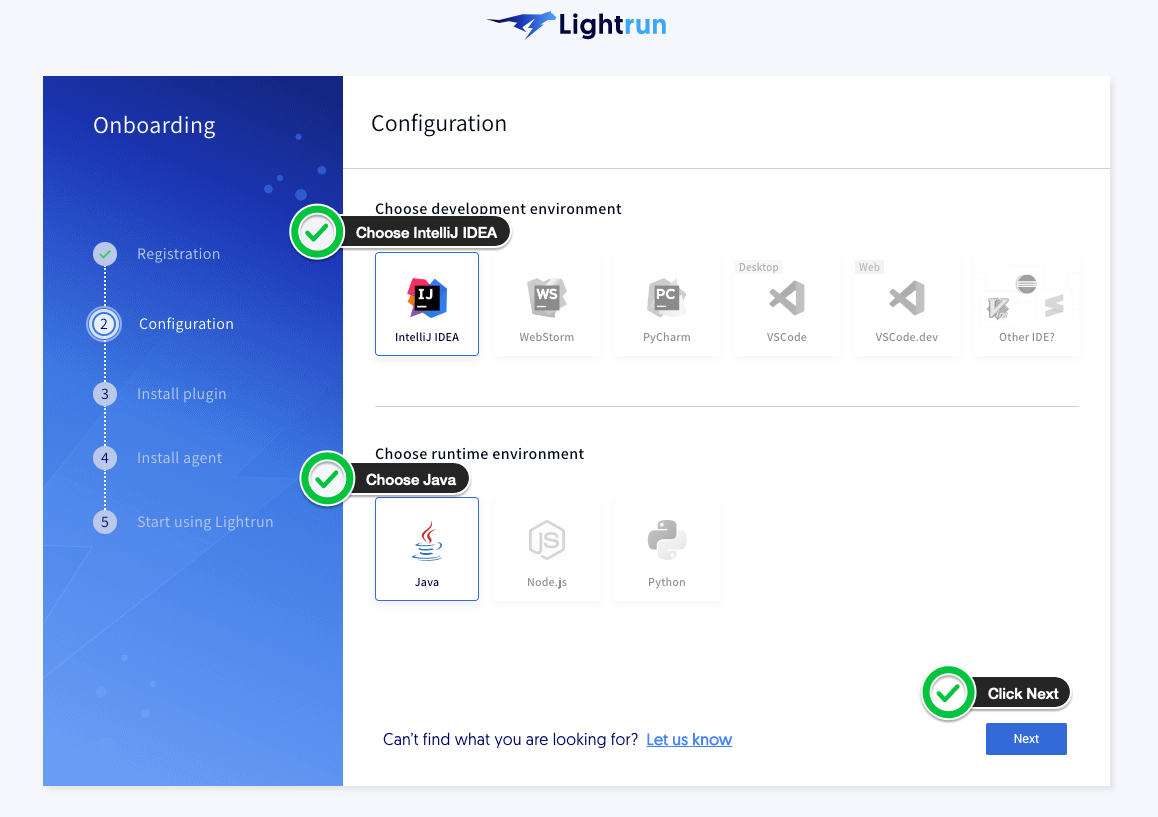
Choose Visual Studio Code and Java as your IDE and language, respectively, then click Next. Fill in your details, choose a company name and click Sign Up, or click Register with Google to use your Google account.

-
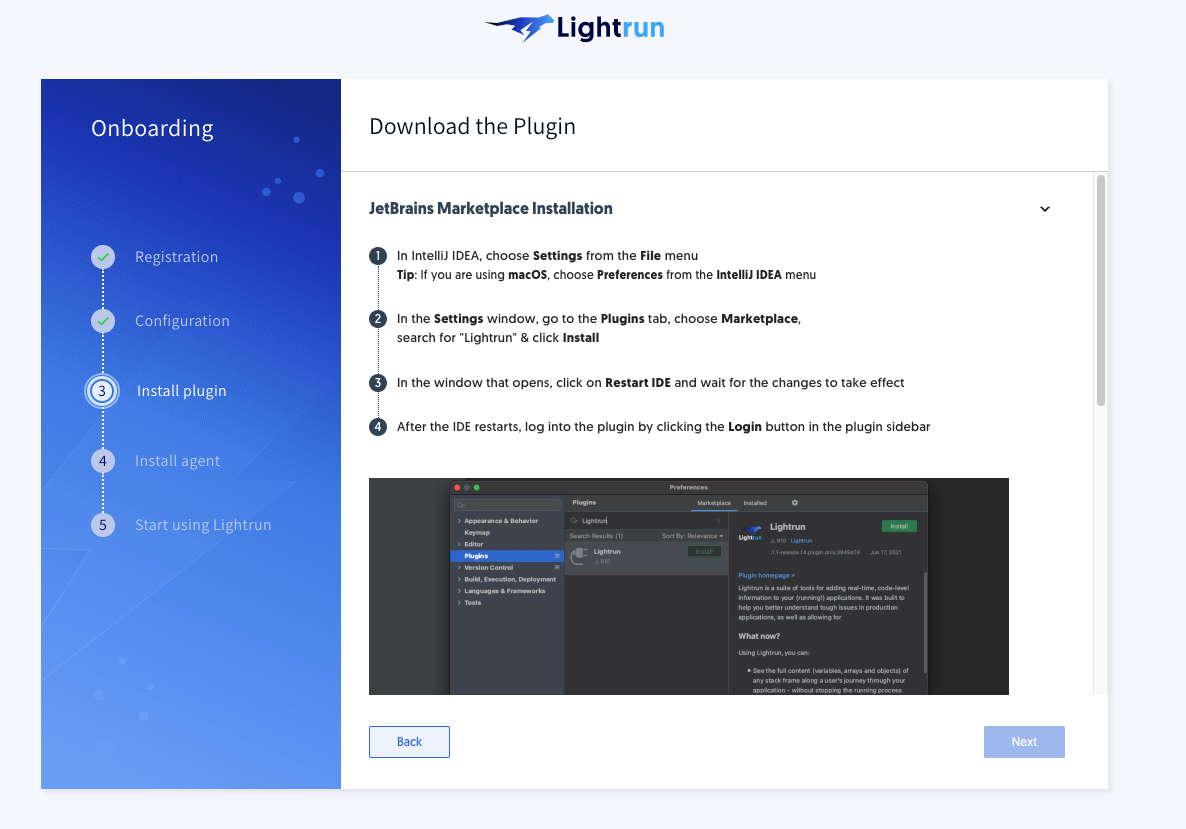
Install the Lightrun IntelliJ Plugin by following the on-screen instructions, then click the (now enabled) Next button.
Note that there are two installation options - using the JetBrains Marketplace or via a manual installation. Both will yield the same result, choose whichever you’re more comfortable with.

-
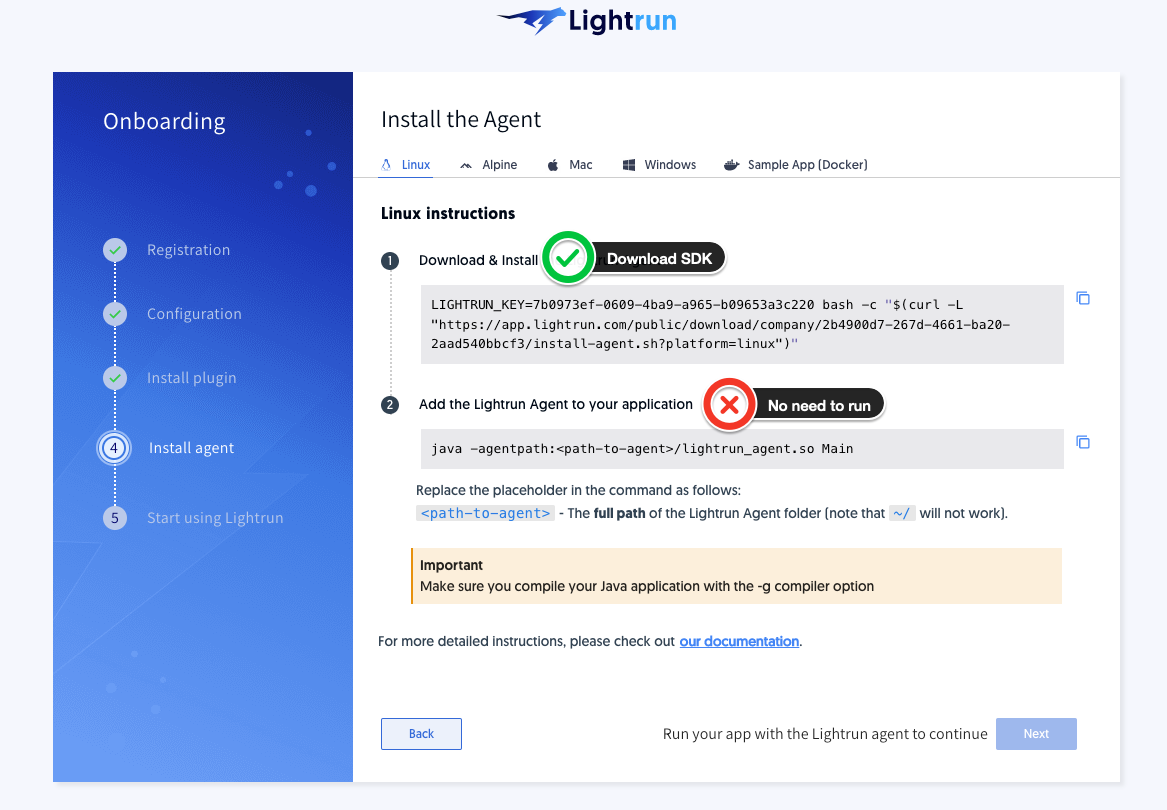
In the next screen, download the Linux version of the Lightrun SDK (formerly known as the Lightrun agent) that will be added to our Docker container later. There is no need to run the application with the agent - we’ll take care of this later on.
Regardless of which operating system you’re working on, this workshop focuses on running our Java application on Linux containers. Please make sure to only use the Linux version of the SDK to avoid any incompatibilities.

-
Note that the Next button will be greyed out, requesting that you run your app with the Lightrun SDK in order to continue. This is fine, and we’ll take care of it later on.